I recently completed the Titans Buidling Block Series and just started CAMing my first actual part. I am trying to select the best operation to finish up after the 3D adaptive clearing. In the examples below, I tried both a 2D Contour and then a 2D pocket. The resulting tool paths appear very similar. In the Building Blocks series, I recall using the 2D Pocket to machine the bottom surface and the 2D Contour for vertical surfaces.
Is either of these better suited for this application? Should I be using 2D contour for the best finish on vertical surfaces and 2D pocket for the bottom or can I just use one of these operations and add a finishing pass for the best possible surface finish? I recently learned about the “Flat” tool path and found that I can use this one as well. At the end of the day, I am trying to understand the nuances of these operations and which of these is the best for this application?
My 2 cents worth, use 2D adaptive if cutting external profiles, internal profiles and pockets at same time, Use 2D contour for profiling, yes you can use it for pocketing, but I use 2D pocket for pockets. 3D adaptive when you have surfaces of different depths (external and internal), yes you can use pocket and machine at different depth of cuts, but 3D adaptive does pretty good automating those tool paths.
I’ll toss my .02 in as well. For an internal pocket I will use the 2D pocket to rough out the majority of the material. I always follow up with a 2D contour for the clean up pass. If I have multiple features I’ll use a 3D adaptive but always follow up with a 2D contour for cleanup. I’ve read up on the flat strategy but have only used it a couple of times.
2D Pocket is a traditional roughing strategy that can finish. 2D Contour is a finishing strategy that can rough. Either one will work fine. As you noticed, depending on how you define 2D Pocket and 2D Contour the toolpaths can be similiar.
The floor and wall finishes are controlled by speeds and feeds. They will usually turn out better if you do one or the other and not both at the same time.
Flat has no Finish Feedrate and no Cutter Compensation. 2D Pocket and 2D Contour have both. Why would you want that? So you can adjust the Finish Feedrate up or down and adjust the toolpath direction or machined part dimensions. BTW - Changing Leads and Transitions on Flat will create a toolpath that doesn’t plunge down a vertical wall.
I would use face and contour after the adaptive. You should change to a 1/8" endmill to get a different picture of each toolpaths.
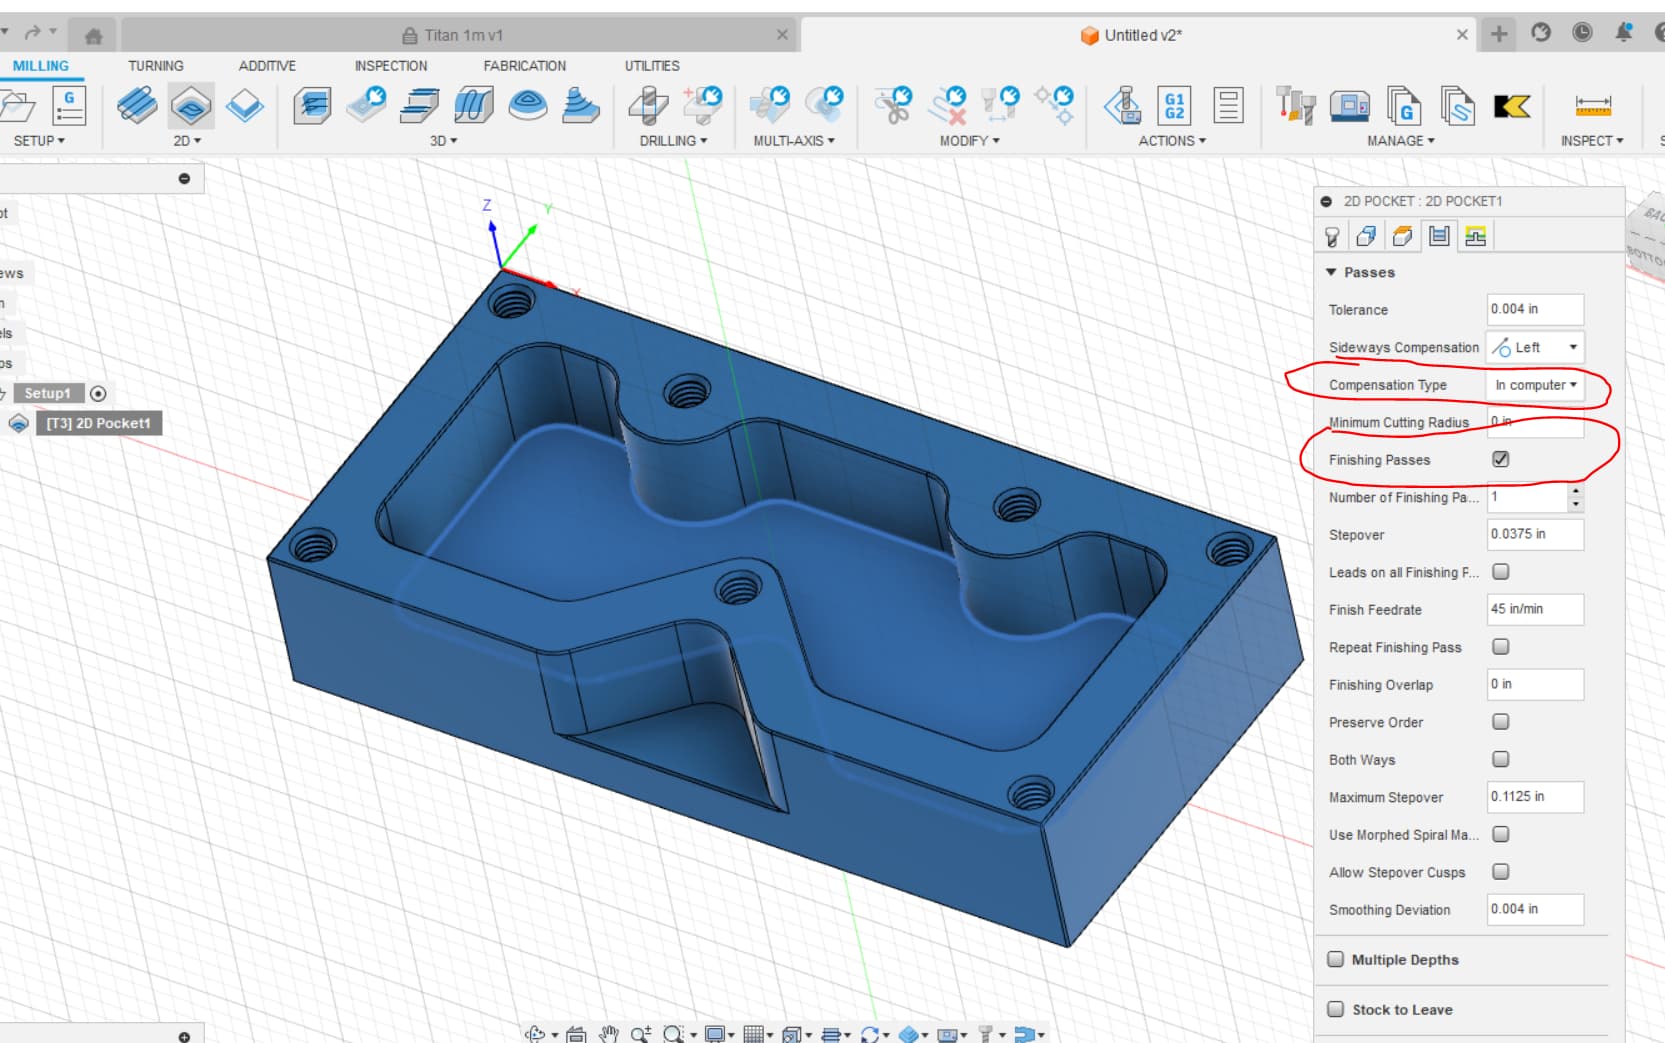
I am a big fan of adaptive in Fusion and Optirough in Mastercam. Titan took us a step further and used the 3d adaptive for roughing. 3d is meant to rough 3d shapes. I like to use 2d adaptive as well in a more of a 2.5 Axis scenario. The Pocket WAS my standby for roughing but now its my standard for finish of floors after adaptive ruff. Pocket also has built in settings for contouring walls as well.
Thanks for all the tips! I think I get the idea that with various settings, you can make several of these operations act like the others. Also, that you can use the Pocket for finishing the walls if you set up the finishing passes. LD, thanks for pointing out the fine details between some of these tool paths.
I do have one more question. I thought that the 3D adaptive would rough out all of the material at various heights. Why did the 3D adaptive leave material at the top of the center of the flywheel (circled in red)? When tried the Flat operation, it removed this extra material.